Disclaimer: Ansible is not officially supported on Windows. Use at your own risk.
With that out of the way, let’s get started. This tutorial will guide you through on how to install WSL (Windows Subsystem for Linux) and Ansible.
I use Ansible on Windows all the time to test playbooks when I am in an environment that Windows is only provided. This allows you to write and test playbooks on your Windows machine. You must be running Windows 1803 or later for this tutorial. You could also deploy a Linux virtual machine, but WSL has matured a lot in the past years.
Install WSL
You will first need to enable the WSL feature in Windows 10. You can do this by running the following PowerShell command in an administrator window.
Enable-WindowsOptionalFeature -Online -FeatureName Microsoft-Windows-Subsystem-Linux
You will have to restart your computer in order for the feature to fully install and be ready to use.
Install Linux distribution
You can choose to install the Linux distribution of your choice. We will be focusing on installing Ubuntu 18.04 LTS and using it for our Ansible controller. It is an easy to use distribution and is a very popular. You can choose to download this from the Microsoft Store or from the command line.
Install Ubuntu from Microsoft Store
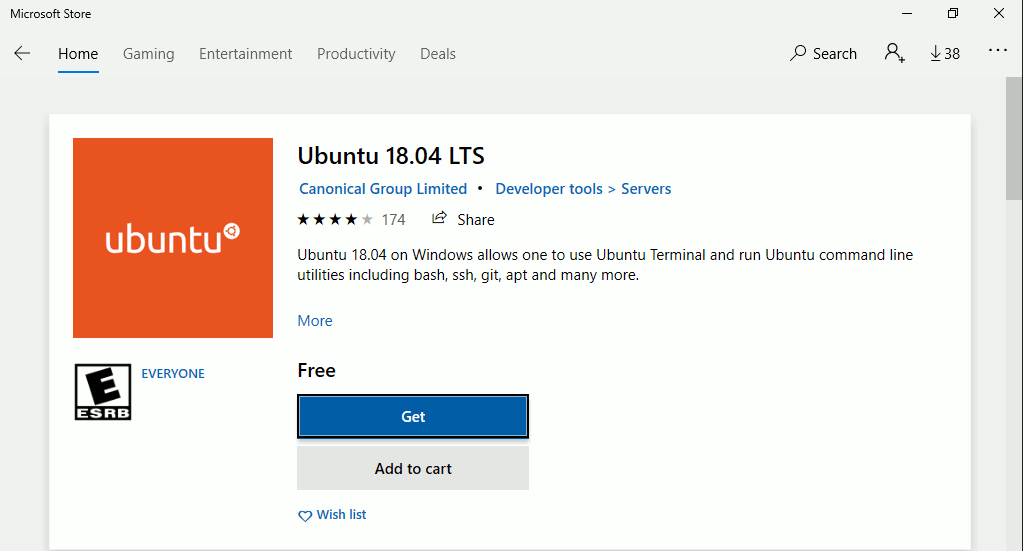
Open the Microsoft Store and search ‘Ubuntu’.

Select Ubuntu 18.04 and it will load the distribution page. You will select ‘Get’ from the distribution page. This will start the download and installation.
Install Ubuntu from PowerShell
You will have to open a PowerShell window and download the distribution to install it. Input the following commands to download and install it.
Invoke-WebRequest -Uri https://aka.ms/wsl-ubuntu-1804 -OutFile ubuntu-1804.appx -UseBasicParsing
Add-AppxPackage .\ubuntu-1804.appx
Initialize your distribution
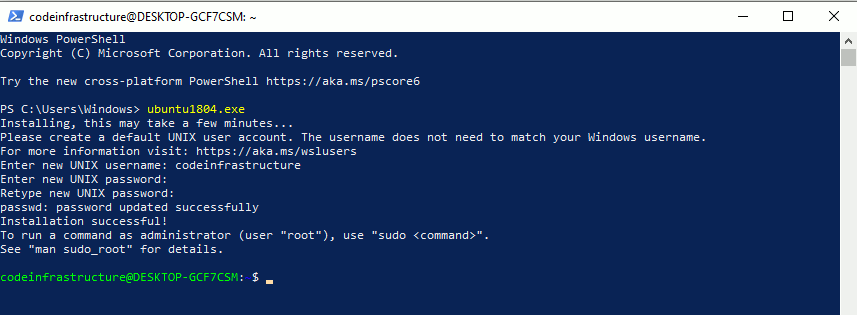
After you download and install the distribution, you will have to initialize it in order to use it. This will prompt for user creation and finish the setup. Open the Start menu and launch Ubuntu 18.04 LTS. An alternative method is to open a PowerShell window and type ‘ubuntu1804.exe’.

Updating the distribution
I suggest you update your distribution fully before we begin. This is easy and you just have to run the following two commands. In the Linux realm, you have to run specific commands as ‘root’. This is essentially like running applications as administrator in Windows. In order to run as root, you have to add the command ‘sudo’ before the command. You may get prompted about restarting services during package upgrades without asking. You can safely choose ‘Yes’ for this setting.
sudo apt update
sudo apt upgrade -y
exit

wsl.exe -t Ubuntu-18.04
Installing Ansible
We are finally ready to start installing Ansible. We will need to add the appropriate PPA for Ubuntu. This will allow us to use the latest version of Ansible. Launch a PowerShell window and run the following commands.
ubuntu1804.exe

sudo apt update
sudo apt install -y software-properties-common
sudo apt-add-repository --yes --update ppa:ansible/ansible
sudo apt install -y ansible
You should now be able to run Ansible from the Ubuntu distribution. Let’s check the version of Ansible that is running.
ansible --version
Conclusion
That is the basics of installing Ansible on Windows 10. This should set you up to run playbooks from your Ubuntu distribution on Windows 10. If you need help getting a playbook setup, please refer to my other blog post regarding ‘Your First Ansible playbook’.